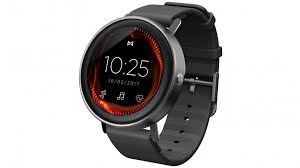
Now, for a few reasons cash is a bit tight right now and I have a few health ‘challenges’. Understanding and doing fitness things is really a funnel for a lot of good feeling vibes for me and helping me get better. This smart watch does do an accurate step count and whilst the wear OS platform is very far from perfect, the plan is to to learn more javascript / react and make my own apps. I’d like to do some interesting programming experiments and the waterproof nature of the watch and it’s function as an mp3 player in the water is too good for me to simply give up and buy something else. So … “just buy a few spare cables from some joint online for work and the car and the job will be done” I thought to myself… ha! Famous last words.
Here’s THAT rabbithole in a sweet shell of a nut:
Ingredients for rabbithole descension:
- Misfit accessories, Misfit support, Aliexpress, ebay .. you are not my friends here.
- Misfit reddit thread, you are my friend.
- Hackerspace Tonsley and the charge cable, you are my friend.
- Fablab Adelaide makerspace, you are a new and much loved friend here.
So first up I couldn’t for the life of me find the specs on the watch and found they weren’t selling the chargers anymore as they were out of stock. I looked over the reddit thread, looked for similar ‘looking’ chargers on aliexpress and ebay, eventually opting to contact misfit support directly. Nothing but tumbleweeds for the whole investigation. Arrrggggh!
Ok sailor, I muttered to myself.. why not head into some of the ace maker spaces in Adelaide and make your own cable. Here’s where the ACTUAL fun got started in the form of two Tony’s.
Tuesday night at hackerspace tonsley, found me perched next to Tony, regular at Hackerspace who sat with me for a good half hour, helping me understand the problem, measuring the current on the pins from the watch and charger and helping me understand what potential I had for possible solutions. I stripped an old ipod cable, realising that sinply for a charge function, all I needed was to connect the pos and neg wires from the cable to the right magnetic pins, mount neodymium magnets to a bit of perspex and hot glue them to place and I should be good to go!
At Fablab Adelaide , not only did the splendiferous Luke help me with a sweet 3D print of a nice charge holder, The fracking amazing Tony in his amazing red braces showed me how to use the laser cutter. We found some scrap acrylic to use as the base and magnet mount for my charge cable. He zapped through measuring my existing charge cable, like a chihuahua through an open back gate and whizzed through adobe illustrator
Time taken to make:
Skill Level: Low / Intermediate
Cost and parts list:
- $10 for the acrylic scrap and the use of the amazing LaserCutter at Fablab Adelaide.
- $0 old USB 2.0 ipod cable (any old mouse cables can be used)
- $1.94 from Ali Express Neo Dymium Magnets
- Solderwing wire
Tools:
- Digital Calipers
- Soldering Iron
- Wire stripper and a stanley knife
- Multimeter
- Access to a laser cutter and a 3D printer
Software:
https://inkscape.org/en/release/0.92.3/
3D print for stand:
Here’s how the USB pinout works